Wednesday, February 22, 2017

Orange Chicken

If you are a fan of Orange Chicken  from the Chinese restaurants, then I am hoping this homemade version is going to bring a smile to our face.  I would love to be able to make it at home.  In the restaurant it normally consists of chopped, battered, and fried pieces of chicken coated in a sweet orange-flavored chili sauce, which thickens or caramelizes to a glaze.


Ingredients
Canola Oil for frying
2 tsp sesame oil
1 egg
1/3 cup corn starch
3 tbsp soy sauce
2 lbs boneless chicken

For the Sauce:
1 1/2 tsp fresh orange zest
2 tbsp fresh orange juice
3 tbsp soy sauce
3 tbsp water
1/3 cup sugar
1/2 cup rice wine vinegar
1/3 cup chicken broth
2 tbsp corn starch
1 tsp canola oil
1 1/2 tsp minced ginger
3 cloves garlic, finely minced

For the Garnish:
sliced green onions 
orange slices


Instructions
    Pour 1 to 2 inches of canola oil in a small deep fryer or heavy bottomed pot and heat to 375 degrees F.  In a large bowl combine the sesame oil, egg, 3 tbsp soy sauce and 1/3 cup corn starch until a thin batter forms. Toss in the chicken pieces and let sit for a few minutes while the oil heats up. Fry the chicken in batches and drain on a paper towel lined plate. Meanwhile, prepare the sauce.


    For the sauce, combine the orange zest, orange juice, 3 tbsp soy sauce, 3 tbsp water, 1/3 cup sugar, 1/3 cup rice wine vinegar (or dry sherry), 1/3 cup chicken broth and 2 tbsp corn starch in a bowl and set aside.

    Once chicken is finished cooking, heat 1 tsp canola oil in a large wok or skillet over medium high heat. Toss in the ginger and garlic and stir until fragrant, about 30 seconds. Pour in the sauce and cook over medium heat until thickened, stirring occasionally.


    Once thickened (about 3 to 4 minutes) add the chicken to the wok and stir to coat with sauce. Garnish with sliced green onions and orange slices and serve over hot steamed rice if desired.


    Tupps Tidbits: When frying don’t overcrowd the pan – you want to fry the meat, not steam it. Fry in batches if necessary.

    Well this left a horrible taste in my mouth, right away. It ruined all the effort Tupps put in to making it. It was a smooth texture sauce and it sticks right to the chicken and did give it a gorgeous shine but the taste was horrible. Definitely needs more orange zest.
     
    NOT a Keeper in our house and not the best homemade orange chicken!

    Where did we find this?  www.iwashyoudry.com

    Wednesday, February 15, 2017

    Cheaters Fried Ice Cream

    Just in time for your next Fiesta night!  Fried ice cream is a dessert made from a breaded scoop of ice cream that is quickly deep-fried creating a warm, crispy shell around the still-cold ice cream.  It is mainly associated with the Mexican cuisine. Recently we had some friends over for a Mexican theme night and decided we would try this.

    Ingredients
    • 5 cups corn flakes cereal
    • 1/2 cup salted butter
    • 2 tsp ground cinnamon
    • Vanilla bean cream, firm enough to shape but just soft enough to scoop
    • Optional servings suggestions:  honey or caramel sauce, chocolate fudge sauce, sweetened whipped cream, cherries 
    Directions 
    • Pour cornflakes into a large Ziploc bag, seal bag and use a rolling pin to crush cornflakes.
    • Melt butter in a non-stick 10-inch fry pan over medium heat.   Once butter is melted, stir in crushed corn flakes and cinnamon and increase heat slightly. Cook mixture stirring constantly until golden brown and fragrant (color will deepen and begin to smell lightly toasty and corn flakes should be crisp), about 2 minutes.  Remove from heat, pour mixture in a shallow dish and allow to cool slightly. Use a form to break mixture down if desired.
    • Remove ice cream from freezer, scoop out desired serving size. Shape into ball with clean hands. Immediately drop shaped ice cream ball into corn flake mixture and roll to evenly coat, while pressing corn flake mixture around the outer surface for a thicker coating as desired.  Serve immediately topped with optional toppings, or place in freezer in an airtight container (without toppings) and chill until serving.

    Tupps Tidbits:  Trick to success with this recipe is the time in the freezer, I think, which allows the ice cream to freeze until it's completely solid.  If you can make it the day or night (without toppings) before is best.

    The taste turned out quit good.  We served it with warm honey drizzled on top with whipped cream and cherries.   It looks fabulous and impressive when you serve it.  Next time, I would add a bit more cinnamon to the ice cream. This recipe is a KEEPER in our HOUSE! YUMO!


    Where did we find this?  www.cookingclassy.com

    Wednesday, February 8, 2017

    No Knead Pan Pizza

    We love making homemade pizza at our house! That's why we are always on the look out for the best crust. This recipe calls for making a deep dish pizza in the cast iron skillet. Cast iron has been used for cooking for thousands of years but fell out of favor in the 60s and 70s when Teflon-coated aluminum non stick cookware was introduced. You will find that most cooks and chefs still recommended  the cast iron as an essential part of any kitchen.

     "Interesting" research states the "way"  you eat your pizza can provide important clues about your personality type.

    How do you  eat your slice?

    If you fold it: Those who fold their pizza slice are considered "drivers." They're multi-taskers; they want to eat the pizza fast, and eat it while doing something else.

    If you start with the crust: People who eat the crust first are described as “influencers” who are spontaneous and like to be different.

    If you use a knife and fork: Those who cut their pizza are generally known as “supporters.” The research says they approach life relaxed and are warm and friendly listeners who likely let their friends get their slice first.

    If you just pick it up and bite:
    Those who eat it with their hands and bite their slice are known as the "careful correctors." They like to plan ahead so everything turns out as expected. They usually stick with the same flavors and toppings.


    Dough
    2 cups all-purpose flour
    1/8 tsp instant or bread machine yeast
    1 tsp salt
    1 Tbsp olive oil
    3/4 to 1 cup water

    Pizza
    1 Tbsp olive oil
    1/2 cup sauce
    1 cup shredded mozzarella
    Toppings of your choice

    Instructions:
    • The day before, combine the flour salt, and yeast in a bowl.  Stir until they're very well combined.  Add 1 Tbsp of olive oil and 3/4 cups water.  Stir until the dough forms a ball.  If there is still dry flour on the bottom of the bowl or dough doesn't form a single, cohesive ball of dough add more water, 1 Tbsp at a time until the dough comes together.  The dough should be slightly sticky and shaggy in appearance.
    • Loosely cover the dough in the bowl and allow it to ferment for 12-16 hours at room temperature.  This develops the gluten, making kneading unnecessary.
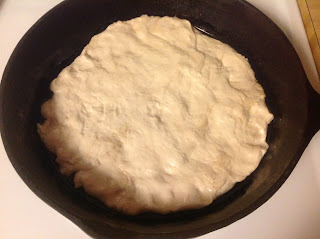
    • When it's time to make the pizza, begin preheating the oven to 450 degrees.  Oil a cast iron skillet with another Tbsp of olive oil.  Use the excess oil from the skillet to oil your hands.  Pull the dough out of the bowl and place it in the oiled skillet.  Press it down into the skillet until it covers the entire bottom of the skillet.
    • Top the pizza with sauce, cheese and your desired toppings.  Cover the pizza edge to edge with the sauce, cheese and toppings.  The dough is very thick, so there is no need for a dry edge or crust around the outside.
    • Bake the pizza in the preheated oven for 18-22 minutes, or until the top is golden brown and the cheese is bubbly.


    Tupps Tidbits:
    First attempt at the crust!
    We did attempted this recipe twice.  The first time we prepared the dough the night before as instructed and then put it in the refrigerator over night. We were "going"  to take it out of the refrigerator in the morning and let it sit at room temperate all day but we forgot until we were on our way to work and it sat in the refrigerator all day.  We took it out about 1 hour before preparing.  After baking, the crust was a bit doughy and little under cooked, so we decided to try the recipe again, doing it as instructed.

    The 2nd time we prepared the crust according to instructions. It was prepared and sat out loosely covered all day at room temperate.  When it was time to make the pizza, we prebaked the  crust and sauce in the oven for about 8 minutes and then removed it and topped the pizza with cheese and toppings and baked for additional 15 minutes.

    The crust was much better and completely cooked. Delicious...if you like Deep Dish this is awesome!  KEEPER IN OUR HOUSE!


    Where did we find this?  https://www.budgetbytes.com/2014/08/knead-pan-pizza/

    Turkey Gnocchi Soup

    What is gnocchi and how do you pronounce it?  Doesn't matter...it is good! YUMO! Gnocchi    N(Y)OK-ee  -  The word  gnocchi  may be deri...